I'm just a real mom who likes to write - about motherhood, my experiments with real food, and my journey in making life less toxic. Grab a cup of tea and stay awhile...
Tuesday, November 26, 2013
DIY Gifts for "Natural Product" Lovers
I don't know about you, but I'm in Christmas mode - and that means I'm thinking about what to give all of the lovely people in my family this year. I wanted some ideas on natural, chemical-free presents I could make for a few individuals, so I decided to create a Pinterest board dedicated to just that - DIY Gifts for "Natural Product" Lovers. While you're fighting that after-turkey nap, kick your feet up and check it out! There are some really great gifts on there :)
Thursday, November 21, 2013
Medicine Cabinet Detox Project - Easy Homemade Cough Syrup Recipe
When I say easy, I mean easy! This recipe is basically herbalist Rosemary Gladstar's Honey Onion Cough Syrup recipe (I don't have a link to the recipe, otherwise I would have included it - here is a link to the video of her making it) - all I did was add some ginger and garlic as she recommends. Just cover the three ingredients in honey, cook on low for about 30 minutes, strain and voila! You have an awesome cough syrup. (After I strained out the onions and garlic, I put them on the burgers I made that night - yum!)
According to www.livestrong.com, "Honey...has been found to be especially useful in treating upper respiratory infections. A study at Penn State College of Medicine in 2007 found that a small dose of buckwheat honey was more effective than an over-the-counter cough treatment for children." Not to mention the fact that the American Academy of Pediatrics now recommends that children under the age of four should not ever be given over-the-counter cough syrup (and I don't even use it myself due to the questionable ingredients, so why would I give it to my kids?). Yet another reason to just go ahead and make your own!
Rosemary Gladstar says that this recipe is a remedy for colds, the flu, sore throats and coughs, and should be taken by the teaspoon (as needed) by children or adults as soon as they feel a cold or flu coming on, as it boosts the immune system. (Due to the raw honey content, do not feed the syrup to children under the age of two.) I didn't think I would like the flavor, but alas, I have been proven wrong. I could do that bottle some damage! My five-year-old even loves it.
Since I'm stingy with my raw honey (because it's usually expensive and I use a lot of it), I cut Rosemary's recipe in half and made a smaller batch so I'd have some honey left over for my Elderberry Immunity Syrup. I'll bet you have all of these ingredients within reach - give it a try!
Easy Homemade Cough Syrup
1/2 of a medium onion
1 cup raw honey (see instructions below)
1-2 cloves garlic, chopped
1/2-inch slice of fresh ginger
Directions: Slice onion into very thin half-moons. Place in an iron skillet or small saucepan and cover with honey until onions are just covered (depending on how big your onion is, it might take more than one cup). Add garlic and ginger. Cook on low heat for 30 minutes, or until onions become soft (make sure the heat doesn't go above low on your stove, otherwise the honey will become too hot and the enzymes will begin to be destroyed). Strain and pour into a glass jar. Label, refrigerate and use as needed. The mixture should keep for several weeks.
According to www.livestrong.com, "Honey...has been found to be especially useful in treating upper respiratory infections. A study at Penn State College of Medicine in 2007 found that a small dose of buckwheat honey was more effective than an over-the-counter cough treatment for children." Not to mention the fact that the American Academy of Pediatrics now recommends that children under the age of four should not ever be given over-the-counter cough syrup (and I don't even use it myself due to the questionable ingredients, so why would I give it to my kids?). Yet another reason to just go ahead and make your own!
![]() |
| Easy Homemade Cough Syrup |
Since I'm stingy with my raw honey (because it's usually expensive and I use a lot of it), I cut Rosemary's recipe in half and made a smaller batch so I'd have some honey left over for my Elderberry Immunity Syrup. I'll bet you have all of these ingredients within reach - give it a try!
Easy Homemade Cough Syrup
1/2 of a medium onion
1 cup raw honey (see instructions below)
1-2 cloves garlic, chopped
1/2-inch slice of fresh ginger
Directions: Slice onion into very thin half-moons. Place in an iron skillet or small saucepan and cover with honey until onions are just covered (depending on how big your onion is, it might take more than one cup). Add garlic and ginger. Cook on low heat for 30 minutes, or until onions become soft (make sure the heat doesn't go above low on your stove, otherwise the honey will become too hot and the enzymes will begin to be destroyed). Strain and pour into a glass jar. Label, refrigerate and use as needed. The mixture should keep for several weeks.
Wednesday, November 13, 2013
Medicine Cabinet Detox: Elderberry Elixir Recipe (For Cold Care)
I can't even begin to describe how much I love this stuff! It's like Elderberry Syrup on steroids. I recently had a cold and took approx. 1/2 tsp of the elixir every 2 to 3 hours (along with about 1 tsp. of Fire Cider in the morning and at night), and my cold immediately started improving and was completely resolved within 2 days. My husband was not a believer until HE got the cold...I started him on the same regimen (except he insisted on taking more than 1/2 tsp. at a time), and guess what? His cold immediately started to improve and was gone within a day or two as well. His only complaint was that it tasted like cough syrup, which it does, but that's because of the alcohol content. The taste does not bother me at all, but it is strong.
According to herbalist Kiva Rose Hardin, " Elderberry is MUCH more effective when not heated in any way… Elderberry does not simply stimulate the immune system, which would make it somewhat dangerous to those with autoimmune disorders or certain other chronic diseases. Rather it modulates the immune system to more appropriately respond to environs and circumstance. It also disarms the virus and helps it flush through body quicker, while strengthening the mucus membranes, supporting the body’s natural fever mechanism without overheating, improves energy and stress handling AND last but certainly not least, it tastes great too...If I had a snake bite, you bet I’d reach for the Echinacea. But for viral afflictions and general immune support, there’s no better herbal ally than the bounteous and lovely Elder!"
I would have to agree with Kiva - I did notice the huge difference in effectiveness between the unheated elixir and the heated Elderberry Syrup. Her recipe on the link above is simple and great - just elderberries, raw honey and brandy - but I used a more "loaded" recipe from The Herb Society. Please visit the link, because it includes some more great information on the Elixir, as well as variations and dosage information. I did alter the recipe slightly based on the ingredients I had available at the time, so I re-wrote it below. Hopefully, you will get over your initial fear of leaving a jar of edibles in the cabinet for 4 to 6 weeks like I did and give this a try. It's probably my favorite cabinet detox project yet!
Elderberry Elixir
2 pint jar and lid - sanitized in boiling water
1/2 ounce dried elderberries (or 2 oz. fresh elderberries to fill approx. half the jar)
1 cinnamon stick
1 oz. ginger root, peeled and chopped
large handful of fresh rosemary and thyme (1/2 rosemary and 1/2 thyme)
chopped peel of half an orange
approximately 1 pint good-quality brandy
1/2 to 1 lb. honey
Directions: Place the herbs in the jar, cover with honey and mix well with the end of a wooden spoon. Add brandy until the jar is full to the brim and mix well again. Place in a cupboard to macerate for 4 to 6 weeks. When maceration is complete, strain with a cheesecloth (make sure to squeeze out the herbs well!) and store in a glass jar with a tight-fitting lid in a cool, dark place.
Dosage: 15 drops or 1/4 to 1/2 tsp. every 2 to 3 hours at the first sign of an oncoming cold.
Thursday, November 7, 2013
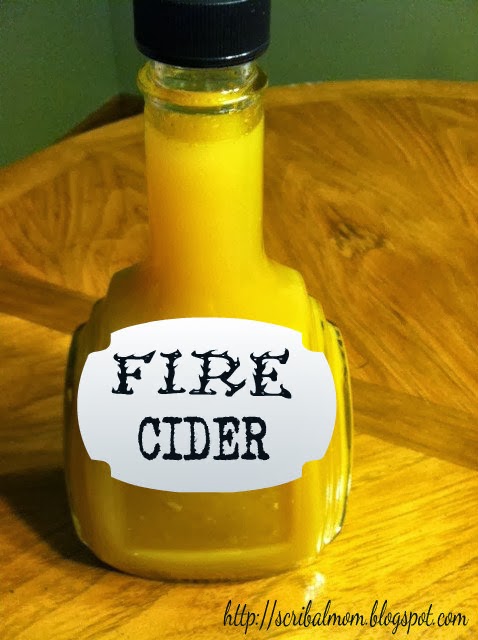
Medicine Cabinet Detox Project: FIRE CIDER Instead of OTC Decongestant!
Fire Cider...sounds intimidating, right? Well, it smells intimidating, too, let me tell you! I came across this traditional cold remedy recipe last year on the Mountain Rose Herb blog and made sure I had all of the ingredients to make it right at the beginning of the Fall, since it needs to "macerate" for approximately 4 weeks. I know, it looks like orange juice, but looks can be deceiving! According to Mountain Rose Herbs, "The tasty combination of vinegar infused with powerful immune-boosting, anti-inflammatory, anti-bacterial, anti-viral, decongestant, and spicy circulatory movers makes this recipe especially pleasant and easy to incorporate into your daily diet to help boost the immune system, stimulate digestion, and get you nice and warmed up on cold days." This remedy is a tangy, spicy, sinus-opening blend of vinegar, jalapenos, horseradish root, ginger, onion and turmeric, among other cold-symptom-fighting ingredients. Thankfully, my batch of Fire Cider finished macerating the same week I came down with a nasty cold - and let me tell you, it cleared up my sinuses immediately and cut my cold symptoms IN HALF by the next day (I took a teaspoonful every 3 to 4 hours). The cold was completely resolved within a few days. (On a side note, my Homemade Vapor Rub was extremely helpful at night.)
Even though it's spicy, it's definitely tasty, and I'm looking forward to making a stir-fry and maybe even some salad dressing with this Fire Cider. Instead of reaching for that OTC decongestant that probably contains phenylephrine (which boasts hypertension as its most common side effect), take a spoonful of Fire Cider instead! It might cause your eyes to water, but that's about it in the way of side effects :). (See the link above for the recipe.)
**NOTE: Don't get too close to the horseradish root while you are shredding it - it's about 100 times worse than cutting an onion. Also, the turmeric will stain surfaces, so be careful to quickly wipe up any spills during the straining process.**
Thursday, October 31, 2013
A Month of Medicine Cabinet Detox Projects - Beginning With Honey Ginger Lemon Tea!
A few years ago, I began my "Cabinet Detox" projects after doing quite a bit of research on foods, ingredients and skin care products - and then reviewing the labels of the items in my cabinets. To my utter shock and disgust, the products I had previously believed to be "healthy" were anything but. It also began to dawn on me that just because I had been using certain products and eating certain foods for most of my life, those foods and products were not necessarily good for me or my body. They were just "familiar", and possibly even recommended by one of my doctors. So, rather than overwhelming myself with information and crazy recipes from Pinterest containing ingredients I couldn't locate, I took my husband's advice and simply took baby steps by completing one Cabinet Detox project at a time.
I found a great website containing information on herbalism, located a good herb supplier, and started making minor changes to my purchasing and eating habits (more organic and whole wheat foods, less preservatives and processed foods, simpler skin care products). It has been a long, slow process - one that is definitely still in progress - but baby steps DO make a difference, and before you know it, you are making multiple, positive changes to the products - and even the "medicines" - that you are using. Those changes, once enacted, begin to build on one another, and after a few years, you realize you have quite an arsenal of recipes, and that your cabinets don't look anything like they used to. For example, I began my Cabinet Detox Projects by replacing some of my personal care products with homemade ones, including Deodorant, moisturizing Lotion Bars and Lip Balm. I also began overhauling my medicine cabinet, and over the last few years concocted Honey Ginger Lemon Tea and Elderberry Syrup for flu prevention and basic immune system boosting during the Fall and Winter months; Homemade Vapor Rub; Honey Onion Cough Syrup; and Garlic Cayenne Oxymel. In addition, I just finished making a much stronger Elderberry Elixir (for adults) and HOT Fire Cider for the cold and flu season that I am very excited to share with you over the course of this month!
Considering both my kids are just getting over nasty sinus infections and sore throats, I have been using the Honey Ginger Lemon Tea and Elderberry Syrup quite a bit lately :). To whet your appetite, my recipe for Honey Ginger Lemon Tea is below. This tea is easy to make, tastes great, and I can attest that it greatly reduces the symptoms and duration of colds that I have had. According to the University of Maryland Medical Center, ginger, in addition to helping in the treatment of the common cold and flu-like symptoms, can also be used to treat motion sickness, vomiting and painful menstrual bleeding. I keep a bag of peeled, sliced ginger in the freezer year-round, as well as a bottle of lemon concentrate in the fridge in case symptoms strike when fresh ginger and lemons are not in the house. I whip up a batch as soon as anyone in the family begins feeling sick, and then at least twice per day until the sickness is gone. I hope you give it a try! Stay tuned this month for more great Medicine Cabinet Detox Projects :)
Honey Ginger Lemon Tea
1/2-inch to 1-inch slice of fresh (or frozen) ginger root, peeled
4 cups water
3 squeezes fresh lemon juice (or one good squeeze of concentrate)
1 teaspoon raw honey (or more or less to taste)
In a saucepan on the stove, bring ginger root and water to a boil, then reduce to simmering for 20 minutes, or until the liquid has been reduced to half the original amount. Remove from heat, pour into a mug, add lemon juice and honey, and enjoy!
*Please note - since ginger may increase the risk of bleeding, consult a doctor regarding ginger use if you are currently taking blood-thinning medications (including aspirin), diabetes medication or high-blood pressure medication (ginger may lower blood pressure in some people).*
I found a great website containing information on herbalism, located a good herb supplier, and started making minor changes to my purchasing and eating habits (more organic and whole wheat foods, less preservatives and processed foods, simpler skin care products). It has been a long, slow process - one that is definitely still in progress - but baby steps DO make a difference, and before you know it, you are making multiple, positive changes to the products - and even the "medicines" - that you are using. Those changes, once enacted, begin to build on one another, and after a few years, you realize you have quite an arsenal of recipes, and that your cabinets don't look anything like they used to. For example, I began my Cabinet Detox Projects by replacing some of my personal care products with homemade ones, including Deodorant, moisturizing Lotion Bars and Lip Balm. I also began overhauling my medicine cabinet, and over the last few years concocted Honey Ginger Lemon Tea and Elderberry Syrup for flu prevention and basic immune system boosting during the Fall and Winter months; Homemade Vapor Rub; Honey Onion Cough Syrup; and Garlic Cayenne Oxymel. In addition, I just finished making a much stronger Elderberry Elixir (for adults) and HOT Fire Cider for the cold and flu season that I am very excited to share with you over the course of this month!
Considering both my kids are just getting over nasty sinus infections and sore throats, I have been using the Honey Ginger Lemon Tea and Elderberry Syrup quite a bit lately :). To whet your appetite, my recipe for Honey Ginger Lemon Tea is below. This tea is easy to make, tastes great, and I can attest that it greatly reduces the symptoms and duration of colds that I have had. According to the University of Maryland Medical Center, ginger, in addition to helping in the treatment of the common cold and flu-like symptoms, can also be used to treat motion sickness, vomiting and painful menstrual bleeding. I keep a bag of peeled, sliced ginger in the freezer year-round, as well as a bottle of lemon concentrate in the fridge in case symptoms strike when fresh ginger and lemons are not in the house. I whip up a batch as soon as anyone in the family begins feeling sick, and then at least twice per day until the sickness is gone. I hope you give it a try! Stay tuned this month for more great Medicine Cabinet Detox Projects :)
Honey Ginger Lemon Tea1/2-inch to 1-inch slice of fresh (or frozen) ginger root, peeled
4 cups water
3 squeezes fresh lemon juice (or one good squeeze of concentrate)
1 teaspoon raw honey (or more or less to taste)
In a saucepan on the stove, bring ginger root and water to a boil, then reduce to simmering for 20 minutes, or until the liquid has been reduced to half the original amount. Remove from heat, pour into a mug, add lemon juice and honey, and enjoy!
*Please note - since ginger may increase the risk of bleeding, consult a doctor regarding ginger use if you are currently taking blood-thinning medications (including aspirin), diabetes medication or high-blood pressure medication (ginger may lower blood pressure in some people).*
Sunday, October 20, 2013
Roasted Acorn Squash Soup w/ Italian Sausage Meatballs
It's not as difficult as it looks - trust me. If you roast the squash ahead of time, the actual soup making process is really quick, and can be done on a weeknight. I don't put soup in food processors, no matter what the recipe says, because I'm rather clumsy (ladling hot liquid into an electrical device? Um, no thanks). In this case, I used my (cheaply made) immersion blender, and it worked just fine. I decided to whip up the meatballs so that my picky family would actually eat it. If I served the soup alone in a bowl, I would get all kinds of "ick" faces and whining, so I decided to sidestep that and make it yummier in the process. My husband and 5-year-old loved it. The 2-year-old ate it, and that was good enough for me. I thought it was delish, and a nice, warm, hearty meal for a cold fall day :)
Roasted Acorn Squash Soup With Italian Sausage Meatballs
Soup
2 medium acorn squash
4-6 cups chicken broth (I added a little chicken bouillon for added flavor)
salt, pepper, and onion powder to taste
1 Tbs butter
2 Tbs fresh sage, chopped (or 1 Tbs dried)
Some of the sausage oil
Parmesan or Romano cheese for garnish
Slice the acorn squash lengthwise and remove seeds and pulp. Place with the cut side down on a roasting pan filled with 1/2 cup water in a 350 degree oven for 45 minutes to 1 hour (or until cooked through and tender). Remove and let cool. Once cool, scoop out the squash and mash it with a fork. Place in an airtight container in the fridge if you are making the soup another day. If not, add the squash to a large saucepan with the chicken broth, salt, pepper, onion powder, butter and sage, and bring to a boil. Reduce heat to low, cover, and simmer for about 30 minutes, or until meatballs are finished. When meatballs are done, pour some of the oil from the pan into the soup. Prior to serving, blend with an immersion blender. Top with meatballs and Parmesan or Romano cheese.
Meatballs
5 links mild Italian sausage, casings removed
1 egg
1/4 cup Italian seasoned bread crumbs (or omit for a GF version)
a sprinkle of garlic powder
1/8 cup grated Parmesan or Romano cheese
1/8-1/4 cup frying oil (olive, coconut, etc.)
Mix all ingredients well. Form into small balls and fry in oil until cooked through. Serve with soup immediately.
Wednesday, October 16, 2013
Make Your Own Granola Cereal - No Refined Sugar or Preservatives!
If you're looking for a great-tasting, EASY granola cereal recipe that is free of preservatives and refined sugar (and can easily be made Gluten Free by substituting GF oats), check out my guest post on Home Hearted! While you're there, take a look at Madalyn's other awesome crafty ideas and recipes :)
Subscribe to:
Posts (Atom)